Side Dishes
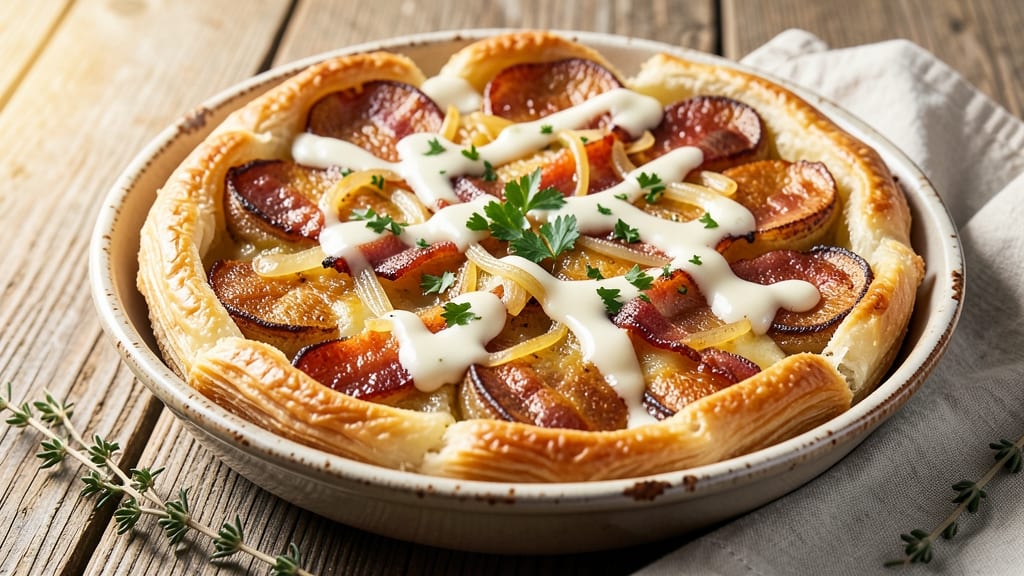
This bacon potato tart recipe delivers the perfect balance of crispy, golden crust and smoky, savory filling in just one pan. The secret lies in layering thinly sliced potatoes with crispy bacon and sharp cheddar, then baking until the top transforms into a crispy, flaky masterpiece.
I've perfected this technique over years of testing, ensuring every bite delivers that satisfying contrast of textures.
What sets this recipe apart is the combination of traditional pastry techniques with modern shortcuts—using store-bought puff pastry for the crust saves time while still achieving that restaurant-quality finish. The filling gets its signature flavor from crispy bacon, caramelized onions, and melted cheddar that binds everything together.
It's the kind of dish that transforms a simple side into the star of the meal.
The result is a tart with a beautifully golden, crispy top that shatters slightly when you cut into it, revealing layers of tender potatoes, smoky bacon, and creamy cheese beneath.
The aroma alone will have everyone gathering around the table, and the first bite delivers that perfect harmony of textures and flavors. This is comfort food at its finest, made even better by the one-pan simplicity.
Whether you're serving this as a side for Sunday dinner or making it the centerpiece of a casual meal, the versatility of this recipe makes it a winner.
The method works equally well with shortcrust pastry if you prefer a different texture, and you can easily customize the filling with additional ingredients like green onions or jalapeños for extra flavor. Let's get started on creating this showstopping dish!
Ingredients for bacon potato tart
Puff pastry, thinly sliced potatoes, and crispy bacon create the perfect harmony of textures and flavors.
| Ingredient | Amount | Notes |
|---|---|---|
| Puff Pastry 🥧 | 1 sheet | Store-bought, thawed if frozen |
| Russet Potatoes 🥔 | 2 lb | Thinly sliced, peeled preferred |
| Bacon 🥓 | 8 oz | Cooked crispy, chopped |
| Yellow Onion 🧅 | 1 whole | Thinly sliced, caramelized |
| Sharp Cheddar Cheese 🧀 | 2 cups | Shredded, block preferred |
| Heavy Cream 🥛 | ½ cup | Full-fat for richness |
| Eggs 🥚 | 1 whole | Beaten for egg wash |
| All-Purpose Flour 🌾 | 1 tbsp | For dusting pastry |
| Salt 🧂 | 1 tsp | Kosher or sea salt |
| Black Pepper 🌶️ | ½ tsp | Freshly ground preferred |
| Garlic Powder 🧄 | ½ tsp | For seasoning filling |
| Olive Oil 🫒 | 1 tbsp | For brushing crust |
The puff pastry is the star of this dish—store-bought sheets save time without sacrificing quality. Look for high-fat content (at least 30%) for that signature flakiness. Brands like Pepperidge Farm or Whole Foods have excellent options. If you prefer homemade, make sure to keep it chilled until ready to use. The Russet potatoes should be peeled and sliced paper-thin (about 1/8-inch thick) for even cooking. Soak them in cold water for 10 minutes to remove excess starch, then pat dry. Costco often has pre-sliced potatoes in the frozen section if you're short on time.
No sharp cheddar? Pepper Jack or Gruyère work beautifully—just adjust the amount to taste. The bacon can be swapped for turkey bacon if you prefer leaner protein, but trust me on the full-fat version for maximum flavor. Caramelizing the onions takes patience, but it's worth it—about 15 minutes over medium-low heat until golden. For a shortcut, use 1/2 cup jarred caramelized onions (like Trader Joe's), but fresh is always better. The heavy cream adds richness, but half-and-half works in a pinch. If you're watching calories, Greek yogurt can replace it, though the texture will differ slightly.
Assemble the tart up to 24 hours ahead and refrigerate—it actually tastes better the next day as flavors meld. Store leftovers in an airtight container for 3-4 days in the fridge. To reheat, cover with foil and warm at 350°F for 10-15 minutes. The crust will crisp up beautifully. For make-ahead convenience, freeze the unbaked tart for up to 2 months—just thaw overnight before baking. The filling reheats beautifully, so double the batch for easy lunches or dinner leftovers.
Why You'll Love This Recipe
- Puff Pastry Shortcut: I’ll admit, I used to dread puff pastry—until I realized you can just press and bake the pre-made sheet. No rolling, no stress. That golden, flaky crust turns this into a 20-minute meal, not a project.
- Bacon-Cheddar Magic: Crispy bacon crumbles mixed with sharp chedddar? Yes, please. The onions caramelize just enough to sweeten the bite, while the potatoes stay creamy—like a loaded grilled cheese had a fancy makeover.
- Lunchbox Hero: Between us, this is my go-to for packed lunches. Slice it up, wrap in foil, and it stays warm and delicious for days. My kids (and my husband) fight over who gets the leftovers—no complaints here.
- Budget Breakfast Hack: Honestly, I make this when I’m low on groceries. Russets are cheap, bacon stretches far, and a single sheet of puff pastry feels like a treat. Plus, it reheats like a dream—no sad, soggy leftovers here.
Step-by-step instructions for bacon potato tart
Here's how to create a golden, flaky crust with a rich, smoky filling that melts in your mouth.
Prepare the Potato and Bacon Filling
Preheat your oven to 425°F while you prepare the filling. Thinly slice the 2 lb Russet Potatoes using a mandoline or sharp knife for even thickness—about ⅛ inch thick. Toss them immediately with 1 tbsp Olive Oil, 1 tsp Salt, 0.5 tsp Black Pepper, and 0.5 tsp Garlic Powder to prevent browning and add flavor.
Cook the 8 oz Bacon in a skillet over medium heat until crispy. Drain on paper towels, then chop into small pieces. Thinly slice the 1 whole Yellow Onion and caramelize it in the same skillet over medium-low heat for 10-12 minutes until golden and tender. Set both aside—they'll add depth to your filling.
Assemble the Tart with Perfect Layering
Roll out the 1 sheet Puff Pastry on a floured surface to fit a 9-inch pie dish, leaving a ½-inch overhang on all sides. Gently press it into the dish, then prick the bottom with a fork to prevent puffing. Freeze for 10 minutes to firm up—this ensures crispy edges later.
In a bowl, combine the sliced potatoes, crispy bacon, caramelized onions, 2 cups Sharp Cheddar Cheese, and 0.5 cup Heavy Cream. Mix gently but thoroughly—you want the cheese to distribute evenly for that signature melt. Spread this mixture into the prepared pastry, mounding it slightly in the center.
Create the Signature Crispy Top
Beat the 1 whole Eggs in a small bowl, then brush the egg wash over the puff pastry edges and the top of the filling. Sprinkle the 1 tbsp All-Purpose Flour evenly over the filling—this creates a golden, crispy crust when baked. The flour acts like a dry barrier that prevents the top from getting soggy.
Bake for 35-40 minutes until the edges are deep golden brown and the filling is bubbling at the edges. The center should still have a slight give when pressed gently—it'll firm up as it cools. If the top browns too quickly, tent loosely with foil after 20 minutes.
Rest and Serve for Maximum Flavor
Let the tart rest for 10 minutes before slicing—this allows the filling to set slightly and makes it easier to serve. The crust should be crisp enough to hold its shape, while the filling remains creamy and rich. If the top isn't crispy enough, broil for 1-2 minutes just before serving.
Cut into wedges and serve warm. The contrast between the flaky, golden crust and the creamy, cheesy potato filling is what makes this dish unforgettable. Pair it with a simple green salad to balance the richness.
Pro Tips For Making Bacon Potato Tart
- PARBOIL POTATOES FIRST: I learned this the hard way—skipping the parboil means your potatoes turn to glue under the cheese. Cut Russets into ¼-inch slices, boil in salted water for 3 minutes, then drain. They’ll hold shape and soak up bacon fat like a dream.
- CRISP THE BACON LOW: Cook the bacon at 275°F (135°C) until just crisp, not black. Cold bacon renders fat slower and stays crispier when mixed into the filling—no more soggy pastry from greasy streaks. (Yes, it takes longer, but your tart won’t taste like a fry-up.)
- SALT THE ONIONS: Finely dice the onion and toss it with ½ teaspoon salt while prepping. It draws out moisture, so when you sauté it later, it caramelizes faster and doesn’t steam into the filling. Less soggy bottom = better crust.
- CHILL THE FILLING: After mixing potatoes, bacon, onion, and cheese, let the filling sit in the fridge for 10 minutes. Cold filling = less melting during assembly, so the puff pastry stays flaky instead of turning into a cheesy puddle. (Trust me, your future self will notice.)
Storing and reheating this recipe
Fridge Storage Tips
Store your bacon potato tart in an airtight container with parchment paper between layers to maintain crispiness. Keep it refrigerated at 40°F or below for up to 3 days. The crust stays crispy best when stored this way, though the filling may soften slightly.
I like using glass Pyrex containers because they keep the tart fresh longer than plastic. 🥧
Freezer-Friendly Tricks
For longer storage, freeze the unbaked tart in a single layer for up to 2 months. Wrap it tightly in plastic wrap followed by foil to prevent freezer burn.
Thaw overnight in the fridge before baking—this preserves the texture perfectly. If you've already baked it, freeze in individual portions for easy reheating. 🧊
Reheating for Crispy Perfection
To restore that golden crust, cover the tart with foil and warm at 350°F for 10-15 minutes. Remove foil for the last 2-3 minutes to crisp the top. For a quick microwave option, cover with a damp paper towel and heat in 30-second intervals until warmed through.
The filling reheats beautifully, but the crust benefits most from oven reheating. 🔥
Make-Ahead Magic
Assemble the tart up to 24 hours ahead and refrigerate—flavors meld beautifully overnight. If baking ahead, store the baked tart in the fridge and reheat before serving. For meal prep, slice into wedges and freeze on a tray before transferring to a bag.
This way, you can grab and reheat just one portion without thawing the whole tart. ✨
Reviving Day-Old Crust
If the crust loses crispness after storage, broil for 1-2 minutes before serving. A quick egg wash and sprinkle of flour before reheating helps restore that golden finish.
For extra crispiness, bake at 400°F for 5 minutes after reheating. The filling stays creamy while the crust regains its satisfying crunch. 💪
Portion Control Secrets
Divide leftovers into single-serving portions before freezing or refrigerating. This prevents soggy bottoms when reheating. I recommend quart-sized freezer bags for individual servings—they stack neatly and thaw faster. Label with dates to track freshness, and always reheat to 165°F for food safety. 📅
Nutrition facts
Frequently asked questions
Can I use shortcrust pastry instead of puff pastry?
Shortcrust works beautifully and gives a denser, buttery texture. For best results, press it into the dish and prick the bottom with a fork. Increase baking time to 40-45 minutes at 400°F since shortcrust doesn't puff. The filling will still be creamy, though the crust will be more tender than flaky.
What makes the top of the tart crispy instead of soggy?
The secret is the egg wash + flour sprinkle combo! The egg creates a golden barrier while the flour absorbs moisture and promotes browning. Never skip pre-baking the pastry edges for 5 minutes before adding filling—this prevents a gummy crust. Also, avoid overfilling the tart to maintain crispiness.
Can I make this tart ahead of time?
Yes! Assemble it up to 24 hours ahead and refrigerate. For baked tarts, store in an airtight container for 3 days. The flavors actually improve overnight. To reheat, cover with foil and warm at 350°F for 10 minutes, then broil 1-2 minutes to restore crispness.
What's the best way to slice thick potato slices?
Use a mandoline slicer set to ⅛-inch thickness for even cooking. If you don't have one, freeze potatoes for 30 minutes first—they'll slice more cleanly. Soak slices in cold water for 10 minutes to remove starch, then pat completely dry before seasoning to prevent a gummy texture.
How do I prevent the bacon from making the filling too greasy?
Drain bacon on paper towels and blot with extra towels to remove excess fat. For extra insurance, place a second layer of paper towels on top of the filling before baking—this absorbs any rendered grease. You can also reduce the bacon to 6 oz if you prefer a leaner filling.