
Side Dishes
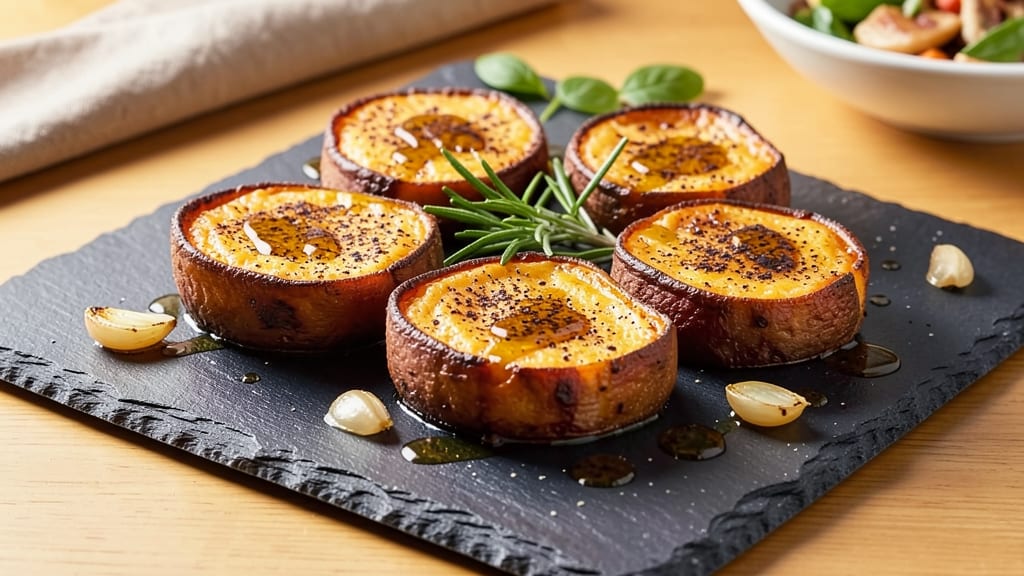
Baked sweet potato medallions transform humble sweet potatoes into restaurant-worthy bites with crispy edges and caramelized centers—no peeling or boiling required. This technique turns a simple side into a star, delivering that perfect contrast of textures that makes every bite irresistible. The secret lies in thin, even slices that cook quickly without drying out, ensuring tender interiors and golden-brown exteriors every time.
What makes these medallions truly special is their versatility. Serve them as a side with roasted meats or as a main dish topped with butter, honey, black beans, or avocado. The natural sweetness pairs beautifully with savory flavors, making them adaptable for any meal.
With just 20 minutes of active prep and 15-20 minutes in the oven, you’ll have a dish that’s both impressive and effortless.
The key to achieving those crispy edges is a light coating of olive oil and a sprinkle of salt before baking. The high heat of the oven caramelizes the natural sugars in the sweet potatoes, creating a depth of flavor that’s hard to resist.
Once baked, they’re ready to be plated—whether as part of a festive spread or a quick weeknight dinner.
These medallions also reheat beautifully, making them perfect for meal prep. Store them in an airtight container for up to 4 days, and simply reheat in the oven or air fryer until crispy again.
The possibilities are endless, from adding them to grain bowls to using them as a base for loaded sweet potato nachos.
Ingredients for baked sweet potato medallions
Thinly sliced sweet potatoes paired with aromatic seasonings create restaurant-quality medallions with perfect crispy edges.
| Ingredient | Amount | Notes |
|---|---|---|
| Medium Sweet Potatoes 🍠 | 2 whole | Organic preferred, uniform size |
| Extra-Virgin Olive Oil 🫒 | 2 tbsp | High-quality, fruity variety |
| Diamond Crystal Kosher Salt 🧂 | 1 tsp | Fine grain for even coating |
| Freshly Ground Black Pepper 🌶️ | ¼ tsp | Freshly cracked for aroma |
| Garlic Cloves 🧄 | 2 cloves | Minced for seasoning |
| Smoked Paprika 🌶️ | ½ tsp | For subtle smoky depth |
| Unsalted Butter 🧈 | 2 tbsp | Melted for post-bake topping |
| Honey 🍯 | 1 tbsp | Wildflower preferred |
| Black Beans 🫘 | ½ cup | Rinsed, for optional topping |
| Avocado 🥑 | ½ whole | Ripe, sliced for garnish |
| Fresh Cilantro 🌿 | ¼ cup | Chopped, for garnish |
The sweet potatoes are the foundation—organic varieties with vibrant orange flesh yield the best texture and flavor. Look for firm, unblemished tubers at Whole Foods or your local farmers' market; they should feel heavy for their size. Uniform thickness is critical for even cooking, so invest in a mandoline slicer for precision. If using conventional store-bought sweet potatoes, choose the smallest size available (about 6-8 oz each) to ensure quick, even baking. The key to crispy edges lies in the evenness of the slices—aim for 1/4-inch thickness, no thicker, to prevent uneven doneness.
No olive oil? Avocado oil works equally well for high-heat baking, though it lacks the fruity depth of extra-virgin. Substituting smoked paprika? Regular paprika plus a pinch of liquid smoke mimics the effect, though the flavor profile will differ slightly. For the garlic, garlic powder at half the amount is a convenient alternative, though fresh minced garlic delivers superior aroma. The black beans and avocado toppings are optional but recommended—they add protein and healthy fats to balance the dish's natural sweetness. If you prefer a different topping, crumbled feta or a sprinkle of cotija cheese would complement the flavors beautifully.
Store baked medallions in an airtight container lined with parchment paper for up to 4 days at room temperature, though they're best enjoyed within 2 days for optimal texture. Reheat in a 375°F oven for 5-7 minutes or an air fryer at 350°F for 3-4 minutes until crispy again. For meal prep, assemble toppings separately and add them fresh when serving to maintain crispness. These medallions freeze beautifully—place them on a baking sheet to freeze solid, then transfer to a sealed bag for up to 3 months. Reheat from frozen in the oven for best results.
Why You'll Love This Recipe
- No-Cut Chaos Allowed: I swear by this trick—just slice the sweet potatoes into thick rounds, no peeling, no fuss. The skin stays on for extra texture, and honestly? The oven does all the work while you sip your coffee.
- Garlic-Kissed Crisp: That first bite—caramelized edges, creamy inside, with just a whisper of roasted garlic? It’s the kind of flavor that makes you pause mid-bite. The olive oil and kosher salt turn these into something restaurant-worthy without trying.
- Lunchbox Hero: Between us, these medallions are my go-to for lunches. I’ll roast a whole sheet pan on Sunday, let them cool, and pack them for the week. Add a sprinkle of pepper, and they’re ready—no reheating needed.
- Budget Win: Sweet potatoes are cheap, and this recipe stretches them far. A single bag feeds my family for days, and the ingredients? Most are already in my pantry. It’s the kind of meal that makes grocery day less stressful.
Step-by-step instructions for crispy sweet potato medallions
Master the technique for perfectly caramelized sweet potato medallions with tender interiors and crispy exteriors.
Prepare and Season the Sweet Potatoes
Preheat your oven to 425°F with a wire rack positioned on the middle oven shelf. Wash the 2 whole medium sweet potatoes thoroughly and pat them completely dry with paper towels—this step is critical for achieving crispy skin. Using a sharp chef's knife, carefully slice each potato crosswise into ½-inch thick medallions, creating 4 medallions total.
Place the medallions in a single layer on a rimmed baking sheet lined with parchment paper, ensuring they don't overlap. This spacing allows for even browning and crisping. In a small bowl, whisk together the 2 tablespoons extra-virgin olive oil, 1 teaspoon diamond crystal kosher salt, 0.25 teaspoon freshly ground black pepper, and 0.5 teaspoon smoked paprika. Drizzle this mixture evenly over the medallions, coating each side thoroughly. Let them sit at room temperature for 10 minutes to allow the seasoning to penetrate slightly.
Bake Until Caramelized and Crispy
Transfer the baking sheet to the preheated oven and bake for 20-25 minutes, flipping the medallions halfway through the cooking time at the 12-13 minute mark. You're aiming for medallions with deep golden brown edges that are crisp to the touch while maintaining a tender, slightly caramelized interior. The key is patience—resist the urge to check early, as this disrupts the oven's heat distribution and can lead to uneven cooking.
When the medallions are nearly done, you'll notice the edges develop a glossy sheen and the aroma of caramelized sweet potato fills your kitchen. They should release easily from the baking sheet when ready. If they're browning too quickly, tent loosely with aluminum foil to prevent over-browning while still achieving crispiness.
Create the Topping Mixture
While the medallions bake, prepare the topping components. In a small saucepan, melt the 2 tablespoons unsalted butter over low heat until just liquid. Remove from heat and stir in the 1 tablespoon honey until fully combined. Set aside. In a separate bowl, mix the 0.5 cup rinsed black beans with the minced 2 cloves garlic, ensuring the beans are warmed through but not mushy.
For the garnish, halve the 0.5 whole avocado and remove the pit. Slice each half into ¼-inch thick strips. Chop the 0.25 cup fresh cilantro finely, removing any tough stems. Keep all components warm until ready to serve.
Assemble and Finish with Warm Toppings
Once the medallions are perfectly caramelized, transfer them immediately to a serving platter. Working quickly, drizzle the honey-butter mixture evenly over the top of all medallions. The residual heat will help the butter melt and create a glossy finish. Spoon the warm black bean mixture alongside the medallions, allowing guests to add as much or as little as they prefer. Arrange the avocado slices and chopped cilantro around the platter for a vibrant presentation.
Serve immediately while the medallions are still warm and crispy. The contrast between the caramelized edges, tender interior, and creamy toppings creates a perfect balance of textures and flavors. For best results, serve within 10 minutes of baking to maintain the ideal crispiness.
Pro Tips For Making Baked Sweet Potato Medallions
- Slice Evenly, Stack Neatly: I learned this the hard way—uneven slices mean uneven baking. Cut potatoes into ½-inch medallions, then stack them in a single layer with a tiny gap between each. This ensures they crisp uniformly instead of sticking together into a gluey mess.
- Salt Before Roasting: More salt than you think, especially if you’re using kosher salt. Toss the medallions with oil and a generous pinch of salt before they hit the pan—this seasoning gets absorbed into the flesh while they roast, not just on the surface.
- Don’t Overcrowd the Pan: I used to pile them high, thinking more would cook faster. Wrong. Give each medallion at least ½ inch of space so they brown, not steam. If your pan’s too small, roast in batches—your patience will pay off with crisp edges.
- Press Garlic Cloves Flat: Skip the mincing—just smash a few garlic cloves with the side of your knife before tossing them in with the oil. The released juices infuse the potatoes faster, and you avoid the bitterness that comes from overcooking minced garlic. (Yes, even if you’re impatient like me.)
Pro cooking tips for this recipe
Slice with Precision
Use a sharp chef's knife or mandoline slicer for perfectly even medallions—this is the secret to consistent crispiness. I slice each sweet potato crosswise into ½-inch thick rounds, ensuring no part exceeds ¼ inch in thickness.
Thinner slices crisp faster, while thicker ones risk drying out. For extra precision, mark your knife with masking tape at the desired thickness before slicing. 🔪
Oven Temperature Control
Preheat your oven to 425°F with a wire rack positioned in the middle. This high heat is crucial for caramelization, but don't let it fool you—sweet potatoes cook faster than you'd expect. Use an oven thermometer to verify accuracy, as many home ovens run 15-25°F hotter or cooler than set.
If your oven runs hot, reduce to 400°F to prevent burning while still achieving crispy edges.
Seasoning Technique
Whisk the olive oil, salt, pepper, and smoked paprika together before drizzling—this ensures an even coating on every medallion. Let them rest for 10 minutes at room temperature before baking; this allows the seasoning to penetrate slightly and prevents moisture loss.
For extra flavor, add ½ teaspoon of garlic powder to the seasoning mix if you're short on time for fresh mincing. 🌶️
Flipping Strategy
Flip the medallions at the 12-13 minute mark using a thin metal spatula—this is when they'll start to release easily from the pan. If they stick, gently scrape the underside with the spatula before flipping.
The second side should take 8-10 minutes to crisp, so don't rush this step. For even browning, rotate the baking sheet 180 degrees halfway through the second side's cooking time.
Caramelization Check
Look for deep golden brown edges with a glossy sheen—this indicates perfect caramelization. The medallions should be crisp to the touch but still tender when pierced with a fork. If they're browning too quickly, tent loosely with aluminum foil to slow the process while maintaining crispiness.
Overcooking turns them dry, so pull them out when they're just slightly underdone—they'll continue cooking off the heat.
Topping Timing Tips
Keep all toppings warm until serving to prevent soggy medallions. Melt the butter and honey together over low heat—never boil, or the honey will crystallize. For the black beans, warm them in a dry skillet for 2-3 minutes to enhance their flavor without adding moisture.
Assemble the dish immediately after baking to preserve that perfect crispy texture. 🥄
Nutrition facts
Frequently asked questions
Can I use regular potatoes instead of sweet potatoes?
Regular potatoes won't work here—they lack the natural sweetness and moist texture that makes these medallions special. Sweet potatoes caramelize beautifully with crispy edges and a tender center, while regular potatoes would turn out dry and bland. For a similar texture, try yams, though the flavor will differ slightly.
How do I fix medallions that came out soggy?
Soggy medallions usually happen from overcrowding on the baking sheet or not drying the potatoes thoroughly. For a quick fix, place them on a wire rack in a 375°F oven for 5-7 minutes to crisp up. Next time, ensure your sweet potatoes are completely dry and give them space on the baking sheet—½-inch gaps between medallions works best.
Can I make these medallions ahead of time?
Store them in an airtight container for up to 4 days at room temperature. Reheat in a 375°F oven for 5-7 minutes or an air fryer at 350°F for 3-4 minutes until crispy again. For meal prep, assemble toppings separately and add them fresh when serving to maintain crispness.
What's the best way to slice sweet potatoes evenly?
Use a sharp chef's knife or mandoline slicer for precision. For knife work, mark your blade with masking tape at ½-inch thickness before slicing. Always slice crosswise (horizontally) to create uniform medallions. If using a mandoline, remove the safety guard and set it to ¼-inch** thickness for perfect, even slices.
Are these medallions kid-friendly?
Yes, but with a few adjustments! Skip the honey topping for little ones and serve with butter or a sprinkle of cinnamon instead. The natural sweetness of the medallions makes them appealing to kids, and the crispy texture adds fun to their meal. You can also cut them into smaller, bite-sized pieces for easier handling.